← All Tutorials
Teams Backup (Microsoft 365) with Iperius
Microsoft Teams is one of the most widely used collaboration tools in the modern workplace, especially within the Microsoft Office 365 suite.
With its chat, meeting, calling, and real-time collaborative editing of Office documents, Teams facilitates teamwork regardless of users’ geographic location.
For many organizations, it is a key element in maintaining productivity and connectivity in an increasingly digital and decentralized workplace.
Since Teams handles often sensitive corporate data, it is essential to ensure security and have the ability to restore information in the event of a malfunction or cyber attack.
For this reason, it is essential to perform regular data backups.
Iperius Backup is a complete solution for Microsoft 365 and Teams backup . (Iperius also supports OneDrive, SharePoint and Exchange Online backup).
Iperius is provided with a perpetual license at a highly competitive price , allowing you to back up an unlimited number of organizations and Microsoft 365 accounts.
Furthermore, Iperius allows you to perform incremental and differential backups continuously, thus ensuring granular data recovery.
Backups can be transferred to unlimited destinations , including NAS devices and Cloud services such as Azure Storage, Google Drive or Amazon S3.
Download the free version of Iperius Backup now and try Microsoft 365 backup.
Creating a Teams account
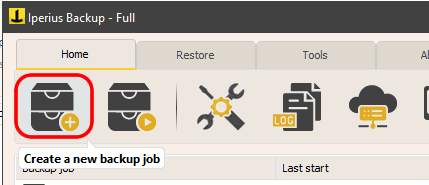
To get started, create a new backup job and, in the first panel (“Items”) click on the “Microsoft 365” button and then on “Add a Teams backup”.

Add a Microsoft 365 account as shown in the image below:
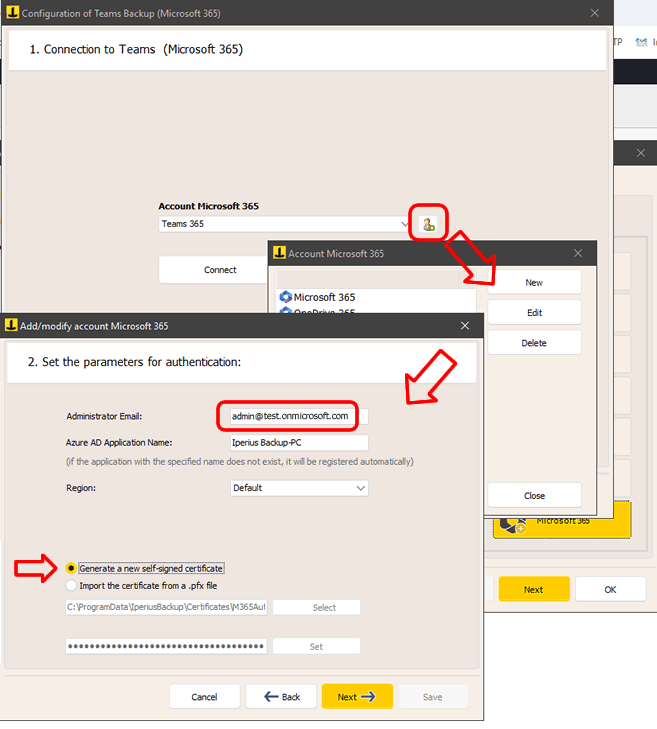
Enter the administrator account email address and the name you want to give to the connection application that will be automatically created within Azure.
Select your organization’s region and the option to create a new self-signed certificate.
If you already have a certificate, you can select it (it will be selected if we are editing your account).
Click “Next”. In the next panel you will have to complete the authentication process through the Microsoft site:
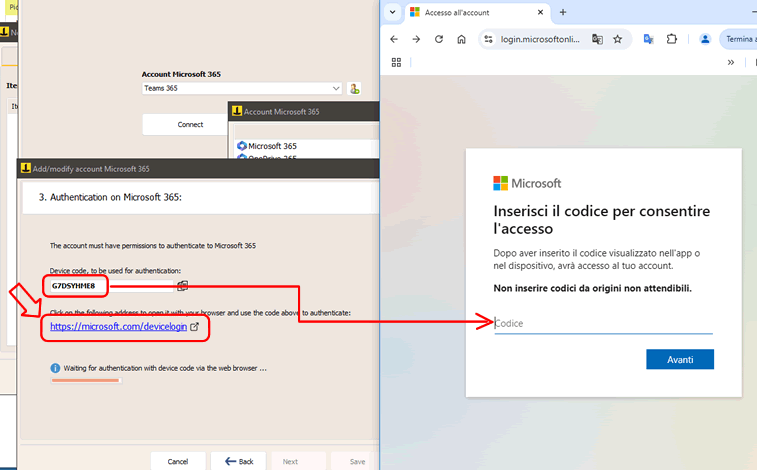
Open the page https://microsoft.com/devicelogin by clicking on the appropriate link, and enter the code shown by Iperius. Then proceed with the login on the Microsoft site, until the final confirmation:
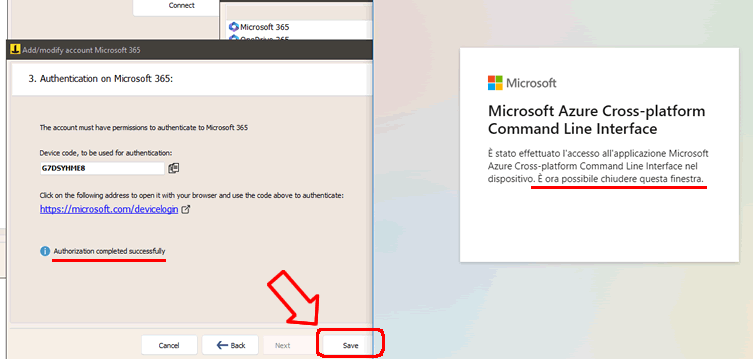
Now go back to the previous window, click on the “Connect” button and then on “Next”.
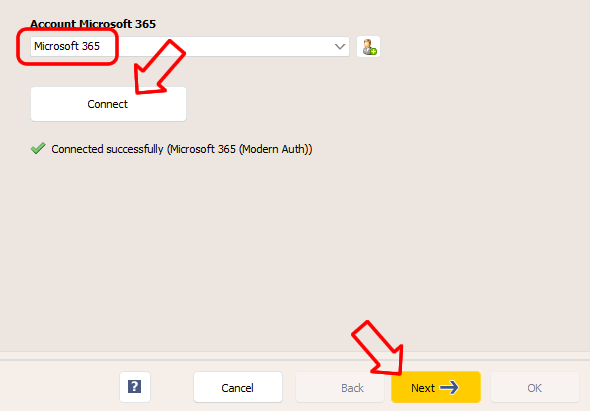
Account selection
After a few seconds, you will see the list of available accounts and teams.
Select the desired accounts and teams and continue by clicking “Next”.
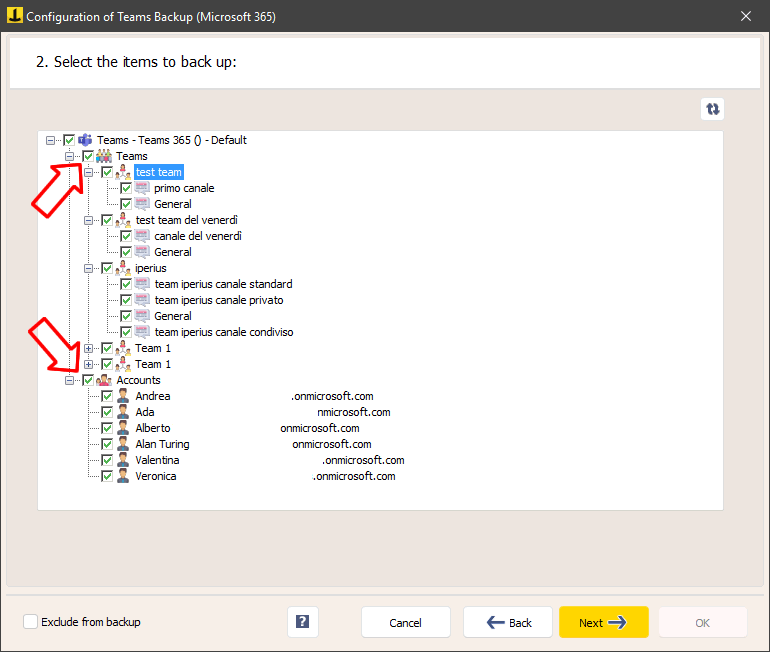
In the next panel, you need to specify some important parameters for the backup:
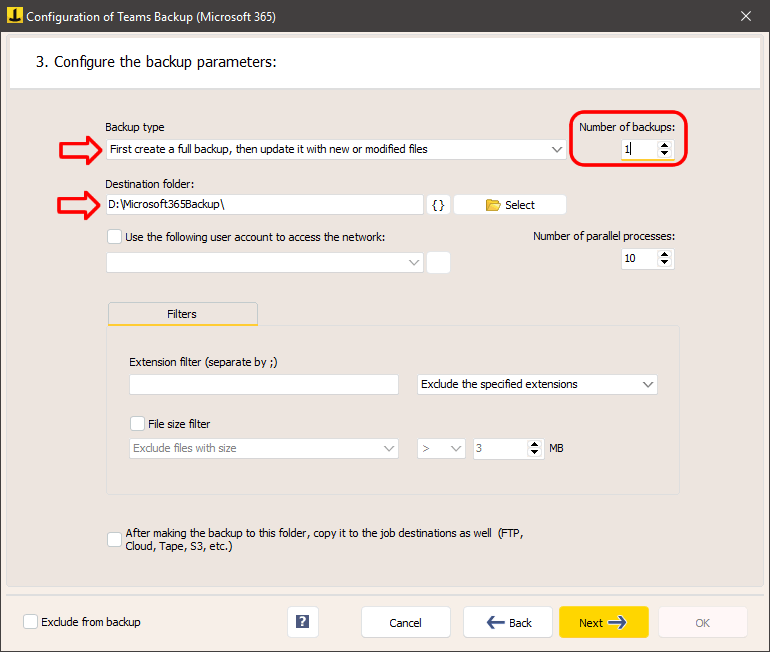
Iperius can perform full, incremental or differential backups, with a specific number of copies to keep.
Choose the local folder where the download will be made.
The backup includes chats, attachments and users.
The last option we see in the window, that is the choice to copy the downloaded items to the destinations of the backup operation, is used to create an additional backup copy of what is downloaded. For example, on a NAS or on a cloud service such as Azure Storage or Amazon S3. These additional destinations can be specified in the next panel of the backup operation configuration (“Destinations”).
Configuring additional destinations (optional)
You can add one or more destinations to make an additional copy of Microsoft 365 items that have been downloaded:
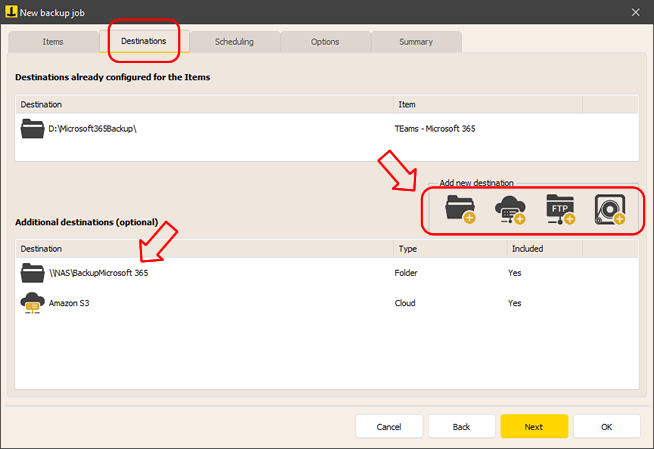
You can then configure the schedule and additional options, such as email notifications when the backup is complete.
Starting the backup
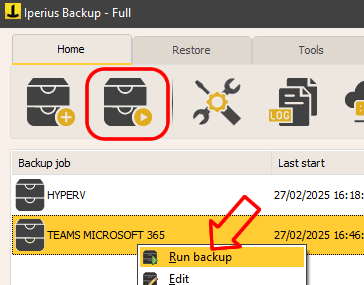
Once you have configured the backup operation, you will find it in the list of Iperius backup operations.
To start it, right-click on the backup you just configured and click “Run”.
Learn how to restore Teams data
For any questions or doubts regarding this tutorial,
Contact us