← All Tutorials
Exchange mail backup from Microsoft 365 to .pst files
Exchange Online, a key element of the Microsoft365 suite, is among the most popular email services globally for managing business communications.
In addition to its main function, it also offers advanced tools for managing calendars and address books, allowing the sharing of data and activities without the need for additional applications.
The Advanced 365 version of Iperius Backup allows you to perform complete, incremental and differential backup (and restore) of Exchange Online , both for your organization’s mailboxes and for local Exchange servers. This guarantees maximum data security, with periodic backups and the ability to restore data if necessary.
This feature allows you to perform a granular backup of emails, calendar events and contacts in .pst, .eml, .ics and .vcf files. The backup can be applied to both individual mailboxes and entire groups, covering all company mailboxes.
Read also: Exchange Server Backup (on-premise) and Export Mailboxes in .PST Format with Iperius Backup
By purchasing a single perpetual license and with a single installation, you can backup (and restore) an unlimited number of mailboxes , whether they are Exchange Online on Microsoft 365 or an on-premises Exchange Server. In addition, you will have free access to all future updates related to your license.
In this tutorial, we will see how to create a backup of one or more Exchange Online mailboxes within a Microsoft 365 organization.
Creating an Exchange Account
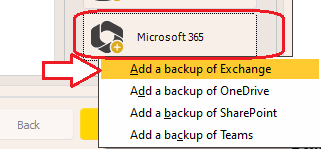
To get started, create a new backup job and, in the first panel (“Items”), click the “Microsoft 365” button and then “Add an Exchange backup”.
Add a Microsoft 365 account and give it an identifying name.
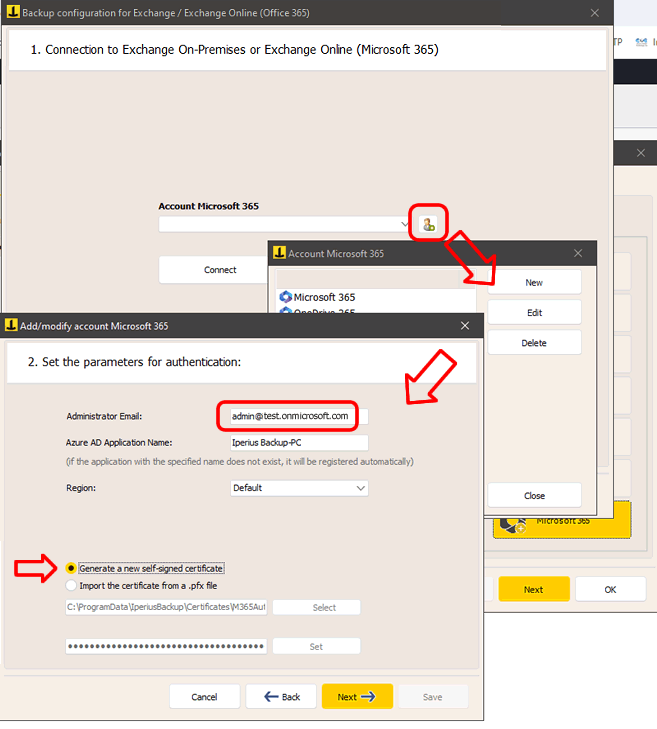
Enter the administrator account email address and the name of the connection application that will be automatically created on Azure.
Select your organization’s region and the option to generate a new self-signed certificate.
If you already have a certificate, you can select it (it will be automatically selected if you are editing your account).
Click “Next”. In the next panel you will have to complete the authentication process through the Microsoft site:
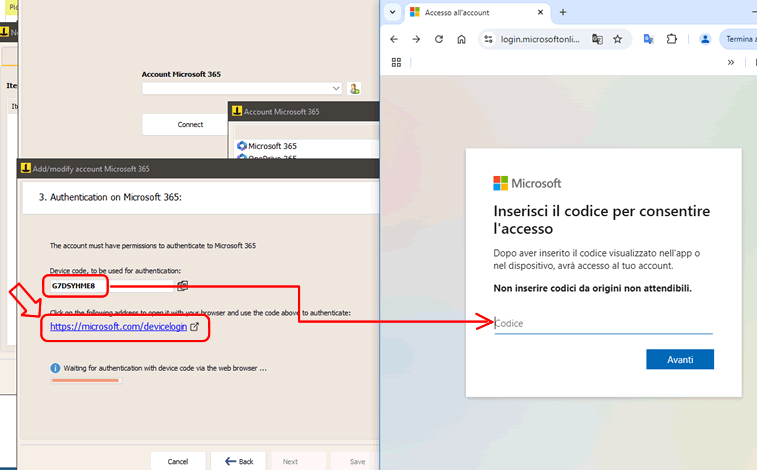
Open the page https://microsoft.com/devicelogin by clicking on the appropriate link, and enter the code shown by Iperius. Then proceed with the login on the Microsoft site, until the final confirmation:
Now go back to the previous window, click on the “Connect” button and then on “Next”.
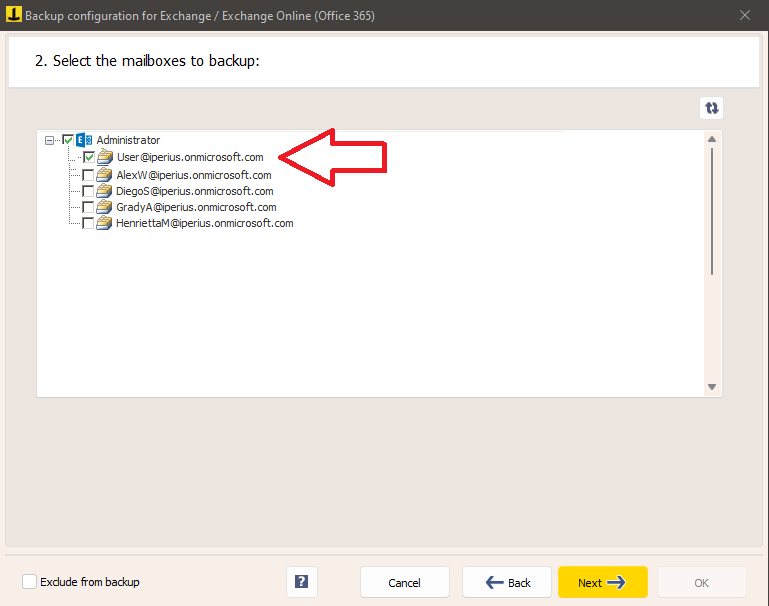
Mailbox selection
After a few seconds, you will be able to see the list of available mailboxes.
Select the mailboxes you want to backup and continue by clicking “Next”.
In the next panel, you need to specify some important parameters for the backup:
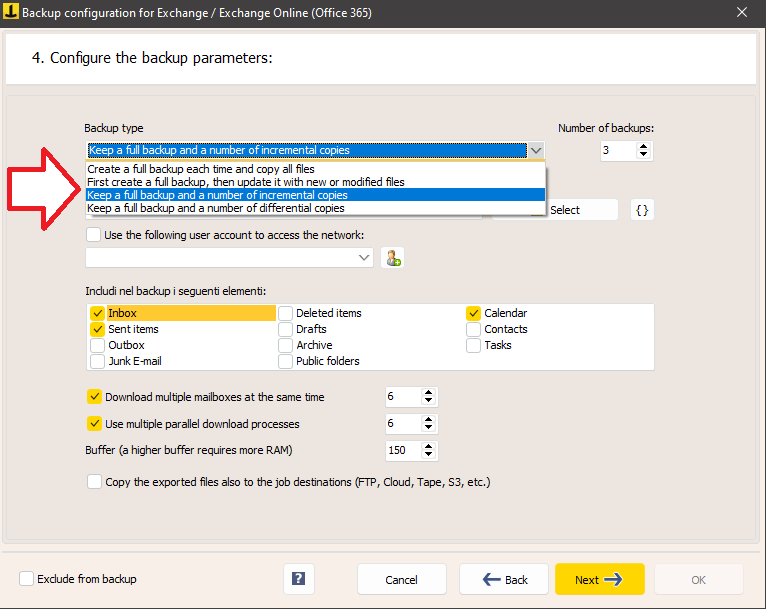
Iperius can perform complete, incremental or differential backups, allowing you to also choose the number of copies to keep.
Choose the local folder where the download will be made.
The backup includes all selected folders (Inbox, Sent Items, Archive, etc.), for all accounts you are backing up.
We can increase performance by adjusting the options related to parallel downloads and memory buffer.
The last option you see in the window, that is, the choice to copy the downloaded items to the backup operation destinations, is used to create an additional backup copy of what is downloaded. For example, on a NAS or on a cloud service such as Azure Storage or Amazon S3. These additional destinations can be specified in the next panel of the backup operation configuration (“Destinations”).
Configuring additional destinations (optional)
You can add one or more destinations to make an additional copy of Microsoft 365 items that have been downloaded:
You can then configure the schedule and additional options such as email notifications at the end of the backup.
Starting the backup
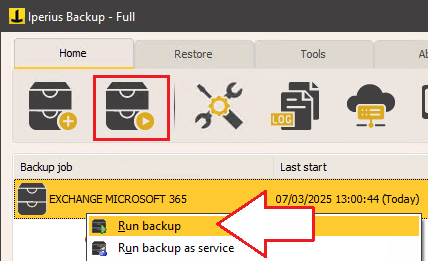
Once you have configured the backup operation, you will find it in the list of Iperius backup operations.
To start it, right-click on the backup you just configured and click on “Run backup”.
Learn how to restore Exchange Online .
For any questions or doubts regarding this tutorial,
Contact us