← All Tutorials
Exchange On-Premises Backup and email export to .pst files with Iperius Backup
Microsoft Exchange On-Premises Backup
With Iperius Backup you can perform advanced backups and restores for Microsoft Exchange Server (On-Premises) and Exchange Online (Microsoft 365), to ensure the protection and recovery of mailboxes in case of need.
Iperius allows you to make both granular backups (single mailboxes in .pst format) and complete backups of the Exchange database, offering VSS Full (with log truncation ) and VSS Copy (without truncation) options.
The software also provides fast and accurate recovery of backup files, allowing both single mailbox recovery and multiple mailboxes restoration from pre-existing backups.
Iperius is compatible with all versions of Exchange Server, from 2010 SP1 to 2019, and requires only .NET Framework 4.5 and Windows Management Framework 4.0 or higher. Backup and restore operations can be performed both from the Exchange server and from other computers on the network.
See also: Backup Microsoft 365 Mail (Exchange Online) with Iperius Backup
With a single license and a single installation , Iperius Backup allows you to protect an unlimited number of mailboxes without additional costs for future updates and technical support.
Creating a .pst backup for Microsoft Exchange
Note: Before proceeding, make sure you have configured the necessary permissions as shown in the following guide:
Exchange Permissions Configuration Guide
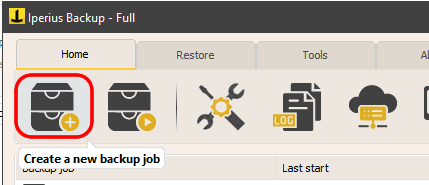
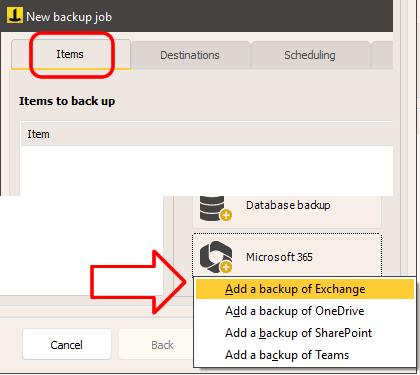
Create a new backup and then add the Exchange backup by clicking the Microsoft 365 button (the backup configuration will differ depending on whether you choose Exchange On-Premises or Exchange Online):
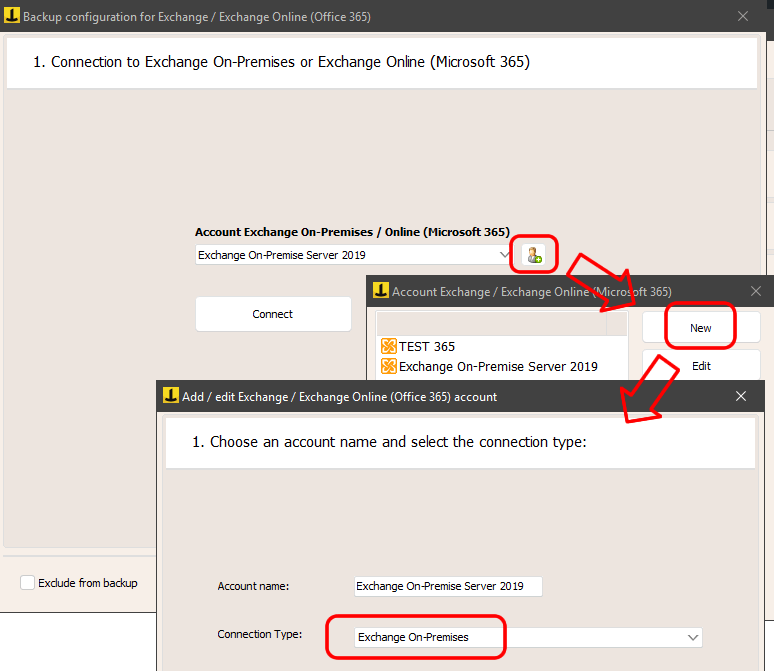
Create a new connection account specifying “Exchange On-Premise” in the connection type:
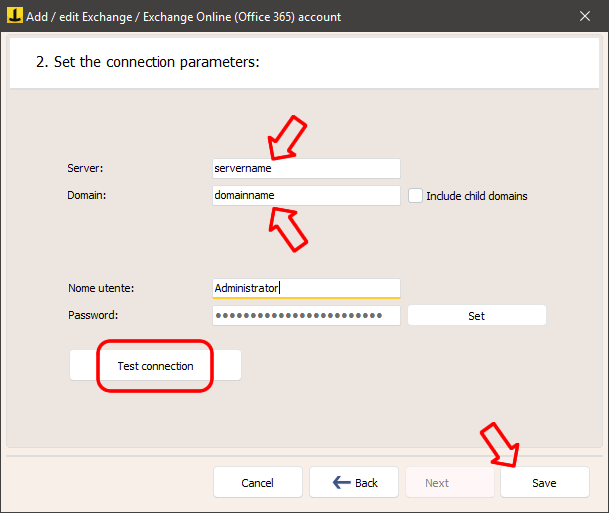
Enter the Exchange Server administrator account credentials, along with the domain and server details. After verifying the connection, save the account.
Once the account is created, close the window to return to the Exchange Backup interface.
Select the account you just configured and click “Connect” to load the list of available mailboxes.
Select the mailboxes you want to backup:
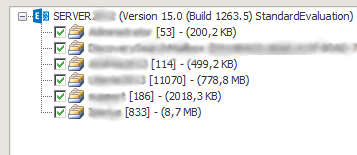
After clicking “Next”, in the next panel choose the backup mode:

In this tutorial we choose the method of exporting mailboxes to .pst files (remember that the drive image backup method is also available, that is, the creation of a complete image of the disk where Microsoft Exchange is installed, with the possibility of log truncation).
Click “Next” to proceed. In the next panel there are several important options, including the path to the backup destination folder :
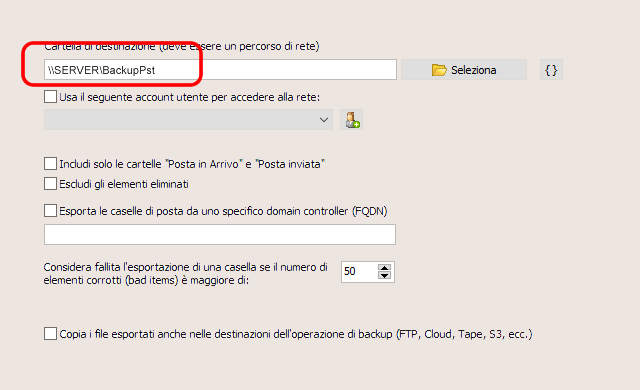
To ensure that Exchange can write to the destination folder correctly, make sure you set the access permissions for the “EXCHANGE TRUSTED SUBSYSTEM” service correctly.
If you want to save backups to other destinations (cloud services like Amazon S3 or Azure Storage, FTP servers or USB disks), enable the “Copy .pst files to backup job destinations…” option.
Save the Exchange backup item by clicking OK, then complete the backup job setup. You can set a schedule or send email notifications:

Performing Exchange Backup
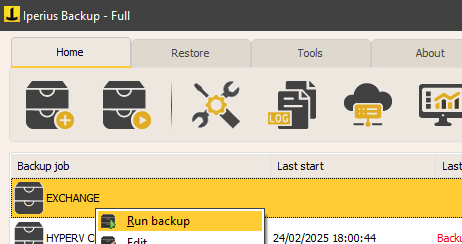
You can immediately try the backup by right-clicking on it and then clicking “Run Backup”:
Exchange Mailbox Recovery
Check out our guide to find out how to import .pst files into Exchange mailboxes using Iperius Backup:
Exchange Restore Guide (.pst File Import)
For any questions or doubts regarding this tutorial,
Contact us