← All Tutorials
Restore Windows Boot with Iperius Recovery Environment
Iperius Recovery Environment is the recovery system specifically designed for Iperius Backup. It is available for download directly from the software and can be started from a USB device or a CD-ROM.
In addition to the ability to restore Iperius Drive Image backups, as explained in our detailed tutorial, this environment can also be used for advanced system operations, solving various issues that may arise after restoring a backup.
In this guide, we will see how to restore the Windows boot in case of startup errors, using simple terminal commands.
Before proceeding, make sure you have correctly created Iperius Recovery Environment on your media (USB or CD-ROM), by following the instructions in the tutorial.
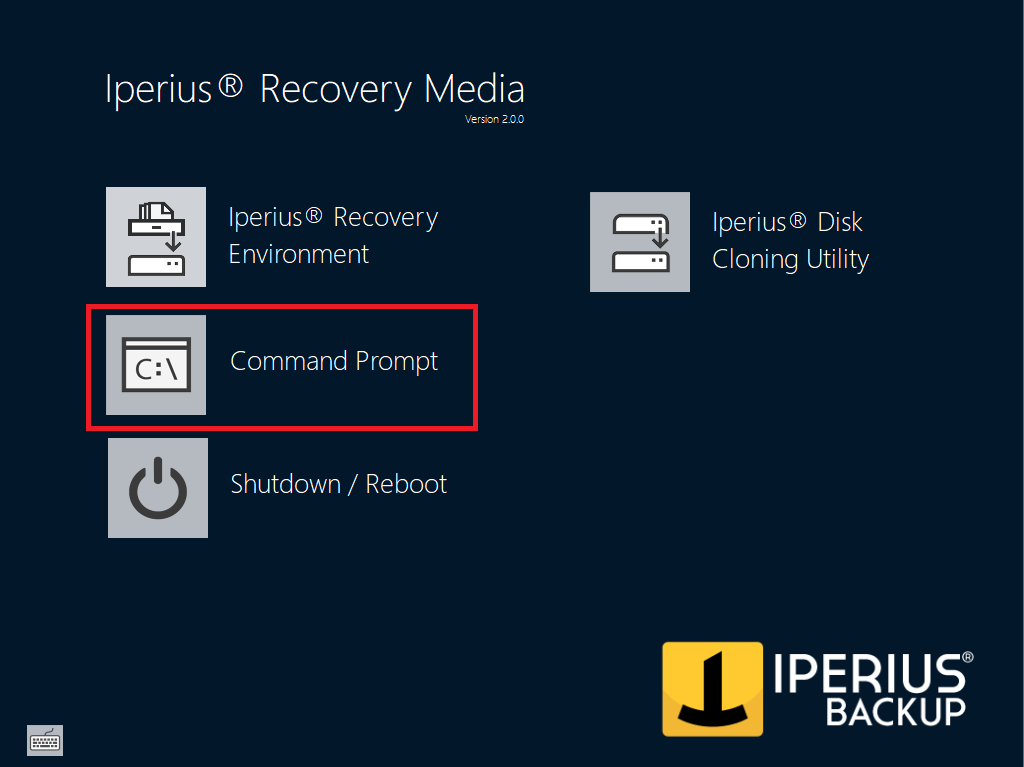
Once the PC is booted from the USB (or CD-ROM) media, launch the command prompt by clicking on the corresponding icon (see image below).
The classic command prompt will open, where you can use the same commands as the standard Windows version.
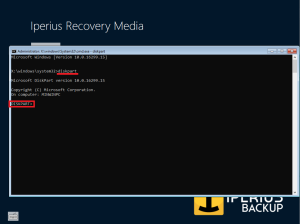
Type the command diskpart and press “Enter”. The left side of the console will change, from the initial directory (e.g., X:\windows\system32) to the word “DISKPART“, indicating that the utility has been started correctly (see image below).
Now, type the command list disk to display the list of disks connected to the system, with information such as number, size, and formatting type (GPT or MBR).
Locate the disk where you restored the image, using size and/or disk index information.
Write down the disk number and check the formatting type: if there is an asterisk under the GPT column, the disk is formatted in GPT, otherwise it is in MBR.
At this point, the tutorial will split into two parts: follow point A) if the disk is GPT, or point B) if it is MBR.
A) GPT Disk
If the disk is GPT, the command list disk will return a result similar to the one in the image below (concerning the disks connected to the system).
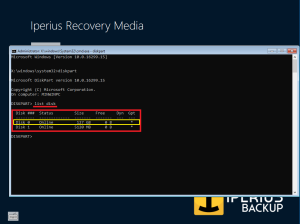
In the red box, you can see the general output, while in the yellow box, the disk where the Iperius Drive Image backup was restored is visible. Write down the disk number, which will be needed for the next step.
In our example, the disk is number 0 (“zero”).
Next, execute the command select disk X (where X is the number we noted), followed by the command list partition.
The output will be similar to the one shown in the following image:
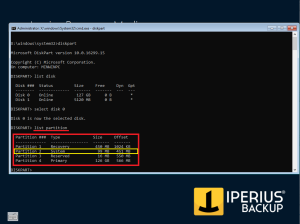
In the red box, you see all the partitions on the disk, with information like index, type, and size. In yellow, the system partition (System), also called EFI, where the BCD (Boot Configuration Data) file is located, is highlighted. This is the file you will repair to restore the boot.
Select the partition by typing select partition Y (where Y is the partition index) and press Enter.
In our case, the system partition is number 2, as shown in the image above.
Now you need to assign a drive letter to the partition to identify it. To do this, type the command assign letter=S and press Enter, as shown in the following image:
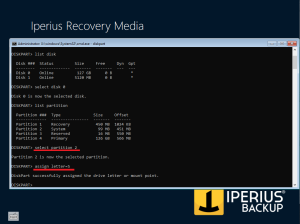
At this point, you can access the system partition volume through the letter S: .
Now you need to locate the volume where Windows is installed. Run the command detail disk to view all volumes on the disk with their related information.
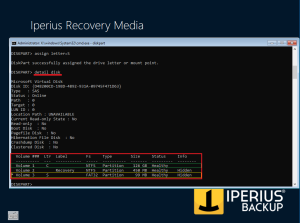
In the result, identify the volume where Windows is installed, using size and/or filesystem as a reference. If it doesn’t have a drive letter, you can assign one with the assign letter command.
In our case, the drive letter is C:, as shown above.
Exit Diskpart with the command exit.
Now the command prompt will return to the initial screen with the path X:\windows\system32.
Proceed to the “Boot Restore” section to complete the tutorial.
B) MBR Disk
If the disk is MBR, the command list disk will return a result similar to the one shown in the image below.
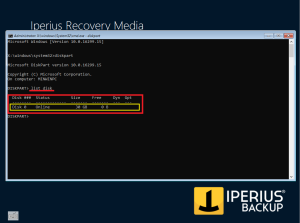
In the red box, you see the general output, while in the yellow box, the disk where the backup was restored is visible. Write down the disk number, which will be needed for the next command.
In this example, the disk is number 0 (“zero”).
Proceed with the command select disk X (where X is the noted number) and then detail disk.
The output will display information about the volumes present on the disk.
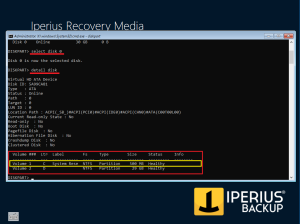
In the result, you can see the volume of the system partition (System Reserved) (in yellow), where the BCD file is located.
Select this volume with the command select volume Y (where Y is the volume index) and press Enter.
Note: if the system partition is not present, refer to the additional note 2 at the end of the tutorial for more details.
If the “Ltr” column is empty, assign a drive letter with the command assign letter=S.
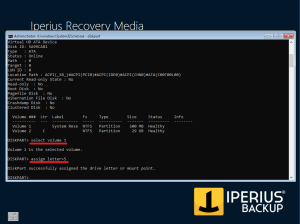
Then proceed to identify the volume where Windows is installed, as described above.
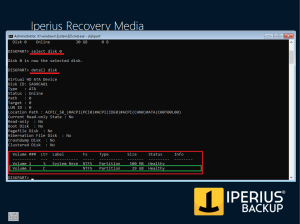
Once the volume is found, check if it has a drive letter. If needed, assign one manually.
Exit Diskpart with exit, then continue with the “Final Step: Boot Restore” section to complete the guide.
Final Step: Boot Restore
Once you have completed the previous steps, you are ready for boot restore. Run the command:
bcdboot C:\Windows /s S: /f ALL
This command will copy the boot data from C:\Windows to the system volume, updating the BCD file.
If everything went well, you will see output similar to this:
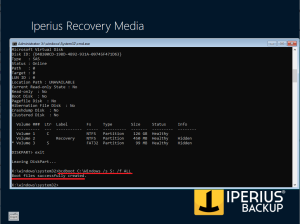
Exit the command prompt by typing exit and pressing Enter.
Now you are back at the main screen of Iperius Recovery Environment.
To finish, click Shutdown/Reboot, remove the USB (or CD-ROM) media, and choose whether to reboot or shut down the PC. Confirm with OK.
Upon restart, the operating system will boot correctly.
A hardware change, a partition error, or the deletion of system files are just some of the causes of Windows not booting.
Thanks to this tutorial, you have learned how to quickly and safely restore the boot without compromising data.
Additional Notes
¹ If the letter S is already assigned to another volume, the utility will return this error:

In this case, repeat the command choosing a free letter.
² In a system with an MBR disk, it may happen that the system partition is not present. However, it is still possible to restore the boot by simply marking the Windows partition as the active system partition.
To do this, follow the steps above to assign a drive letter to the Windows partition if there isn’t one already, and of course skip the entire section regarding the system partition
Before exiting diskpart, with the Windows partition selected from the previous operation, type the command active and press Enter. This will make the partition recognized as the one to boot the system from.
At this point, exit diskpart and use the following command to restore the boot (in our example, the Windows partition has been assigned the letter C:)
bcdboot C:\Windows /s C: /f ALL
Compared to the generic command, we can see how the Windows partition is used as the system partition (it follows the /s attribute).
For any questions or doubts regarding this tutorial,
Contact us