← All Tutorials
Disk Image Backup, P2V, and Disk Cloning with Iperius
Among the advanced features of Iperius Backup, the disk image and disk cloning functions stand out, perfect for virtualizing physical machines (Physical To Virtual, P2V).
Disk images are an extremely reliable backup method as they are exact copies of the hard disk. By capturing the entire state of a disk, the disk image provides a complete backup solution for Windows, ensuring that all aspects of the system can be accurately restored in case of data loss, corruption, or hardware failure. Disaster recovery is therefore extremely fast.
Iperius also supports incremental disk image backups. To do this, Iperius uses its proprietary CBT Driver, which tracks all changes that occur at the sector level of disks, and a dedicated VSS Provider to create consistent, “point-in-time” images of the system.
In this tutorial, we will analyze in detail how to leverage these new options to perform backup drive images of workstations and servers, clone entire disks, or even virtualize Windows operating systems, making them bootable directly in Hyper-V. This backup methodology enables instant restore, as the cloned disk (.VHD or .VHDX) can be immediately mounted on a Hyper-V virtual machine for system boot.
Iperius’ drive image also allows for restoring the backup on different hardware, supports RAID disks, and is compatible with all Windows operating systems (7, 8, 10, Windows 11, Server 2008/R2, Server 2012/R2, Server 2016, 2019, 2022, Server 2025).
Additionally, it is easy to create a “recovery disk” on a USB flash drive or an .ISO file to burn. Through a simple interface, you can boot any other computer and perform a bare-metal restore (disaster recovery), whereby the disk image backup is written to a physical disk.
Now, let’s see how to perform an Iperius Drive Image, saving the Windows 11 system disk to a .VHDX file.
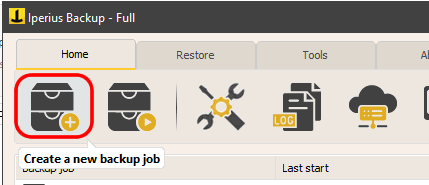
To start, create a new backup job:
Now add a new item to the backup: the Iperius disk image, as shown in the following image:

Select the “Iperius Disk Image” mode and click “Next” to select the disks:

Iperius automatically detects the disk containing the system partitions (identifiable by the Windows icon). By selecting the system disk, such as C:, all related partitions will be automatically included to ensure a consistent system backup that is immediately bootable after a potential restore. The entire disk will be saved to a .VHD or .VHDX file, depending on the version of Windows.
Proceed with configuring the destination folder and the backup type:
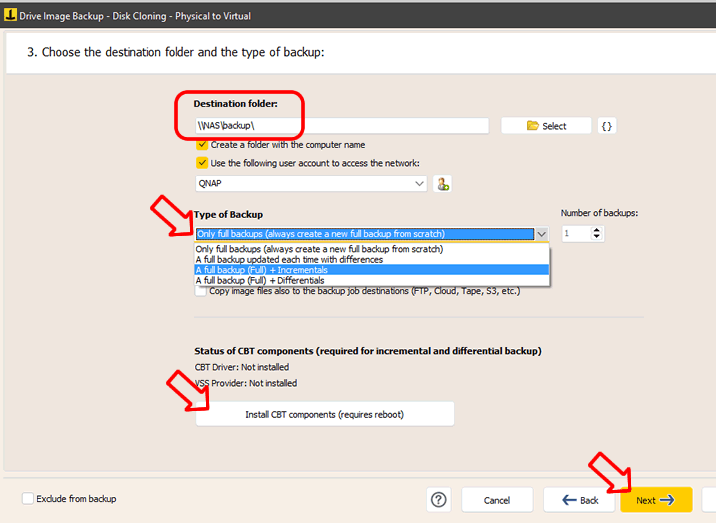
Enter the path of a destination folder in the text field. This destination can also be a network path on a NAS device. In this case, you should also specify an account with the credentials for accessing the network resource.
Available backup types:
- Full backups only: Each run overwrites the previous full backup.
- Full backup updated with differences: After the first Full, the differences are integrated into the same image.
- Full backup + Incrementals: Creation of an initial Full and subsequent incremental copies.
- Full backup + Differentials: Creation of an initial Full and subsequent differential copies.
If you choose an incremental or differential backup, you must install the CBT components. After installation, a system reboot will be required, which can be done later, after finishing the backup configuration.
Additional Destinations
In addition to the primary destination specified in this configuration, which must be on local or LAN network disks, you can make further copies of the disk image backup to various other destinations, including cloud storage services (Amazon S3, Google Drive, Azure Storage, etc.), FTPS or SFTP servers, or LTO tape devices. To do all this automatically, just check the option “Copy image files also to the destinations of the backup operation (FTP, Cloud, Tape, S3, etc.)” and then, in the “Destinations” panel of the backup operation, add the other destinations.
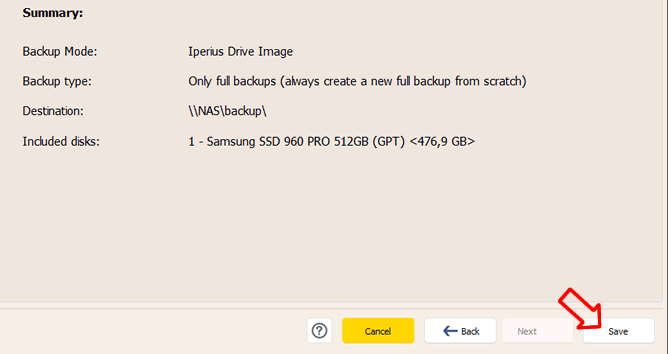
Now that the configuration is complete, you can save the disk image backup item configuration by clicking “Save”:
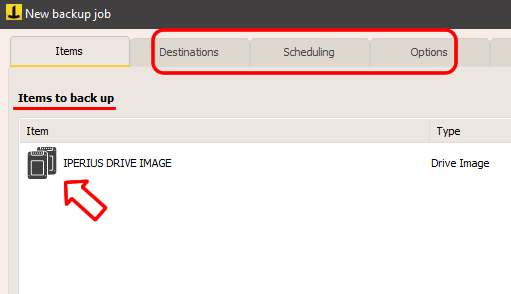
Then, once the backup item has been created, you can proceed with any other configurations, such as possible additional destinations to save the disk image backup to the cloud, automatic backup scheduling, and options like sending email notifications at the end of the backup.
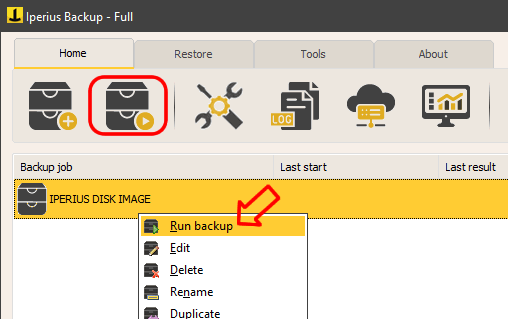
As soon as you have completed creating the backup job, you can run it immediately:
At the end of the backup, you will find the .VHDX files of the selected disks in the destination folder, ready to be explored, mounted as virtual machines, or restored to a new machine.
Restore a Disk Image Backup:
To create a recovery disk, refer to this tutorial: Create a Recovery Disk.
For bare-metal restore, follow this guide: Bare-Metal Restore.
To recover individual files, refer to this tutorial: Restore Individual Files.
For any questions or doubts regarding this tutorial,
Contact us