← All Tutorials
Create a USB or ISO recovery disk with Iperius
With Iperius, you can create a recovery disk to boot the system and restore a backup (disk image) created with Iperius (in .VHD or .VHDX format).
This is either a USB recovery drive or an .ISO file (which can then be burned to a CD or DVD). The recovery media will include Iperius Recovery Environment®, a WinPE-based interface that will be booted at system startup, allowing you to perform a bare-metal restore of a disk image made by Iperius, even on different hardware.
In this guide, we will walk through the simple steps to create a recovery disk for Windows 10 or Windows 11, but the procedure is valid for all 32-bit and 64-bit Windows operating systems, from Windows 7 to Windows Server 2025.
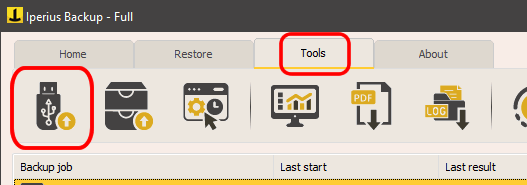
To access the recovery disk creation window, click the highlighted button in the image below within the “Tools” menu:
As shown in the following image, simply select a few easy options:
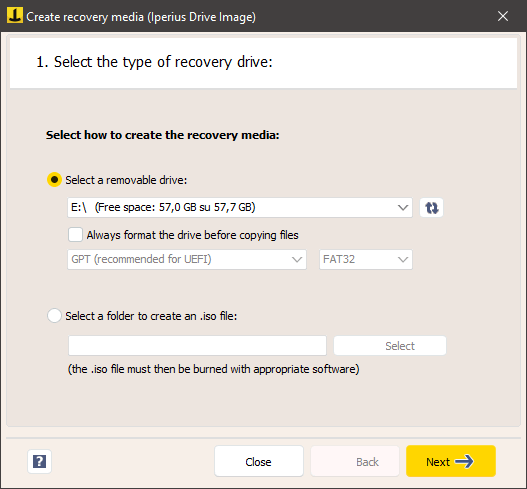
You can choose where to create the recovery media, in a specific folder or on a removable drive. Additionally, you can format the drive according to the specifications of the machine where the restore will be performed.
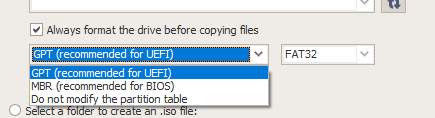
If the computer uses UEFI BIOS, it is recommended to select GPT conversion (FAT32 or NTFS), while with traditional BIOS, MBR is preferred. If in doubt, you can skip the formatting and simply try with an empty USB stick.
It is also possible to keep the partition table unchanged.
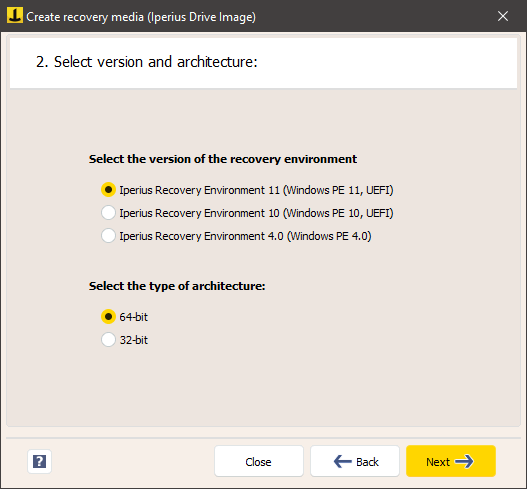
In the next panel, we can select the type of recovery environment we want to create. Generally, it is always better to use the most modern versions and opt for older versions only if we have older hardware.
In the next panel, we can include, if necessary, additional drivers to our recovery environment. Additional drivers are required if, for example, we need to restore a backup to a RAID disk array. In this case, we would need to select the drivers from the RAID provider.
After selecting the desired options, you can start creating the recovery disk by clicking the corresponding button in the final panel:

The process may take several minutes as the necessary files will be downloaded from Iperius servers, extracted, and written to the USB drive.
Warning: this operation will permanently erase all data on the USB drive, so it is important to ensure that no important files are lost.
If you prefer to create a recovery CD instead of a USB drive, simply select the mode to generate an .ISO file, which can then be burned to a CD or DVD with any burning software. This option is useful to boot the system from a CD, especially on older hardware.
Once the recovery media creation process is complete, it will be ready for immediate use on the target machine to boot with Iperius Recovery Environment®.
For any questions or doubts regarding this tutorial,
Contact us