← All Tutorials
Cloud Backup on Iperius Storage S3
Along with Iperius Backup, a secure and reliable Cloud storage service can be activated: Iperius Storage S3.
This service allows you to easily and securely store files on Iperius’ S3 cloud storage platform, located in Tier IV datacenters certified ISO 27001 within the European Union (Florence and Milan, Italy). One of the best solutions for data sovereignty and compliance with the GDPR regulation.
Online backup is essential to protect your data from hardware failures, theft, natural disasters, and, of course, cyber threats such as ransomware viruses. Having one or more copies of your files in the cloud provides an additional level of protection, ensuring absolute security for your business and guaranteeing operational continuity.
Iperius Backup is a versatile software that allows you to back up files, virtual machines (VMware ESXi and Hyper-V), SQL Server databases, Microsoft 365 accounts, workstations, and servers via disk images. All of these backups can be easily sent to cloud destinations. In addition to Iperius Storage S3, Iperius also supports automatic backups to Google Drive, Amazon S3, Wasabi Cloud Storage, Aruba Cloud, OneDrive, Microsoft Azure Storage, Dropbox, Google Cloud Storage, and any other S3-compatible storage. Iperius’ offering is extremely broad, providing unparalleled configuration flexibility.
In addition to the major storage services mentioned earlier, Iperius offers two professional solutions, Iperius Storage FTPS and Iperius Storage S3, both fully integrated and transparently usable through Iperius Backup.
In this guide, we will see how to activate your Iperius Storage S3 plan and how to upload your files to the cloud.
To purchase Iperius Storage S3 space, simply visit this page. You can choose from plans ranging from 50 GB to 3 TB. After completing the purchase (you can pay by credit card or PayPal), you will receive the necessary credentials to configure the backup: the Access Key and Secret Key, typical of every S3 storage system.
Configuring the backup on Iperius Storage S3 with Iperius is very simple.
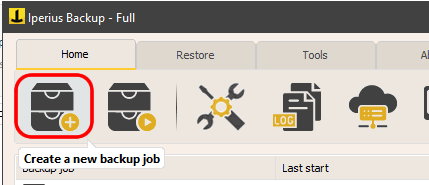
Start by creating a new backup operation by clicking the appropriate button:
Select the files and folders you want to back up:

Naturally, in this section, you can also configure special backup items, such as disk images, virtual machine backups, database backups, or Microsoft 365 accounts.
Now, let’s proceed to the next step: configuring the destination on Iperius Storage S3:
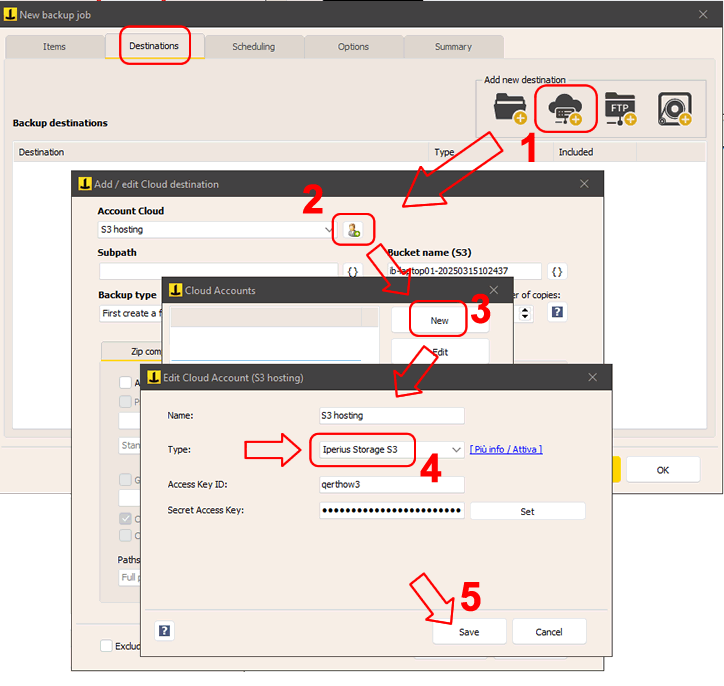
To configure the destination on Iperius Storage S3, you need to first create the corresponding connection account. As shown in the image above, click the button to add a new account, then select “New,” choose the “Iperius Storage S3” type, and enter the Access Key and Secret Key that were provided to you upon purchase. After clicking “Save” (a connection test will be performed), close the window to return to the destination configuration.

As you can see in the image, there are several configurable options for the destination on Iperius Storage S3. The first thing to choose is the bucket name (the bucket is a primary container for files and folders and must be globally unique, meaning no other user can have chosen the same name). Then, you can specify the path to a subfolder, the type of backup (full, incremental, differential), and file compression in zip format before transfer. There are also options to protect the zip file with a password, enable synchronization, etc…
Finally, click OK to apply the configurations and proceed with the backup.
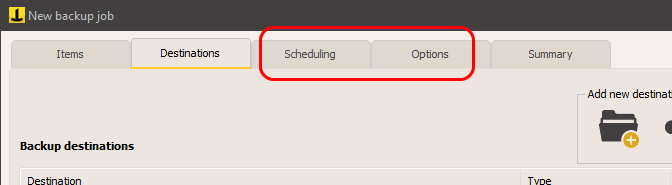
In the following panels, you can set up the automatic backup schedule and email notifications to keep you updated on the outcome of the backup process. For these settings, refer to the corresponding tutorials.
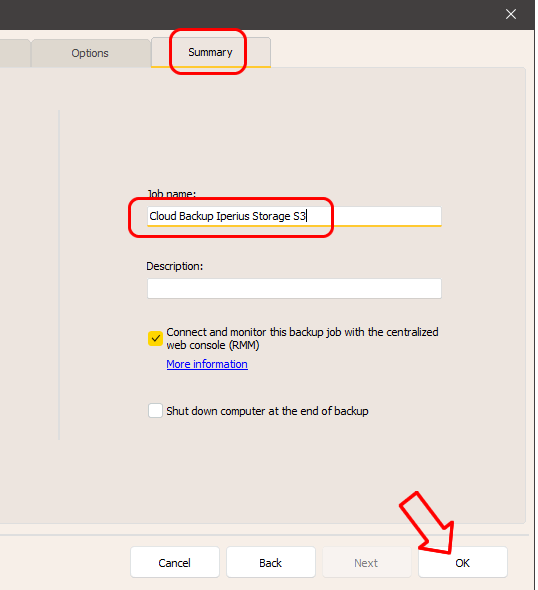
Finally, in the last panel, write the name of the backup operation and save it by clicking “OK.”
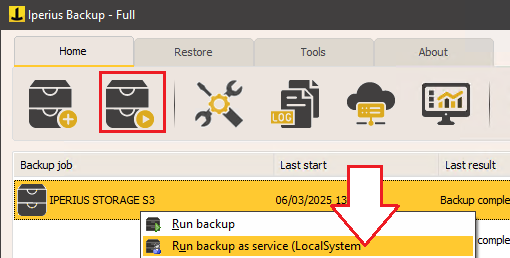
Now that the backup configuration is complete, you can immediately run the backup operation by right-clicking and selecting “Run backup.”
Iperius will automatically upload the files to the Iperius Storage S3 space, creating a secure, fast, and always available backup.
For any questions or doubts regarding this tutorial,
Contact us