← All Tutorials
How to backup to IBM Cloud with Iperius Backup
IBM Cloud is a cloud platform developed by IBM, offering a wide range of cloud solutions and services related to data, containers, artificial intelligence, the Internet of Things (IoT), and blockchain.
Among the many services available, we find network management, SQL and NoSQL databases, data science tools, data analytics, IBM Watson for artificial intelligence processing, and much more. Additionally, IBM Cloud also provides solutions for online data storage, such as IBM Cloud Object Storage, which is compatible with the S3 standard.
Iperius Backup supports backup to major cloud destinations – including Dropbox, OneDrive, Azure Storage, Google Drive, Amazon S3 – and can also back up to any S3-compatible storage, such as Wasabi, Aruba Cloud, BackBlaze, and many others, including IBM Cloud services.
In this tutorial, we will see how to configure Iperius Backup to perform a backup to an S3 account of IBM Cloud Object Storage.
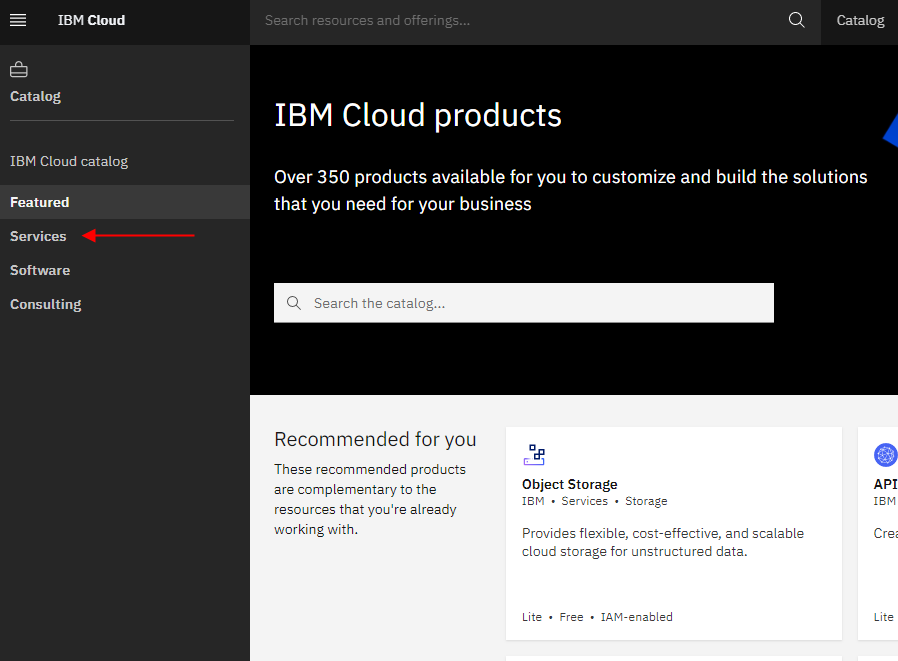
To get started, log in to IBM Cloud at this link, where you can create an account and take advantage of numerous services listed in the Catalog, including Cloud Storage. After logging in, click “Catalog” in the top bar:

In the side menu, select “Services” and then click “Object Storage”:
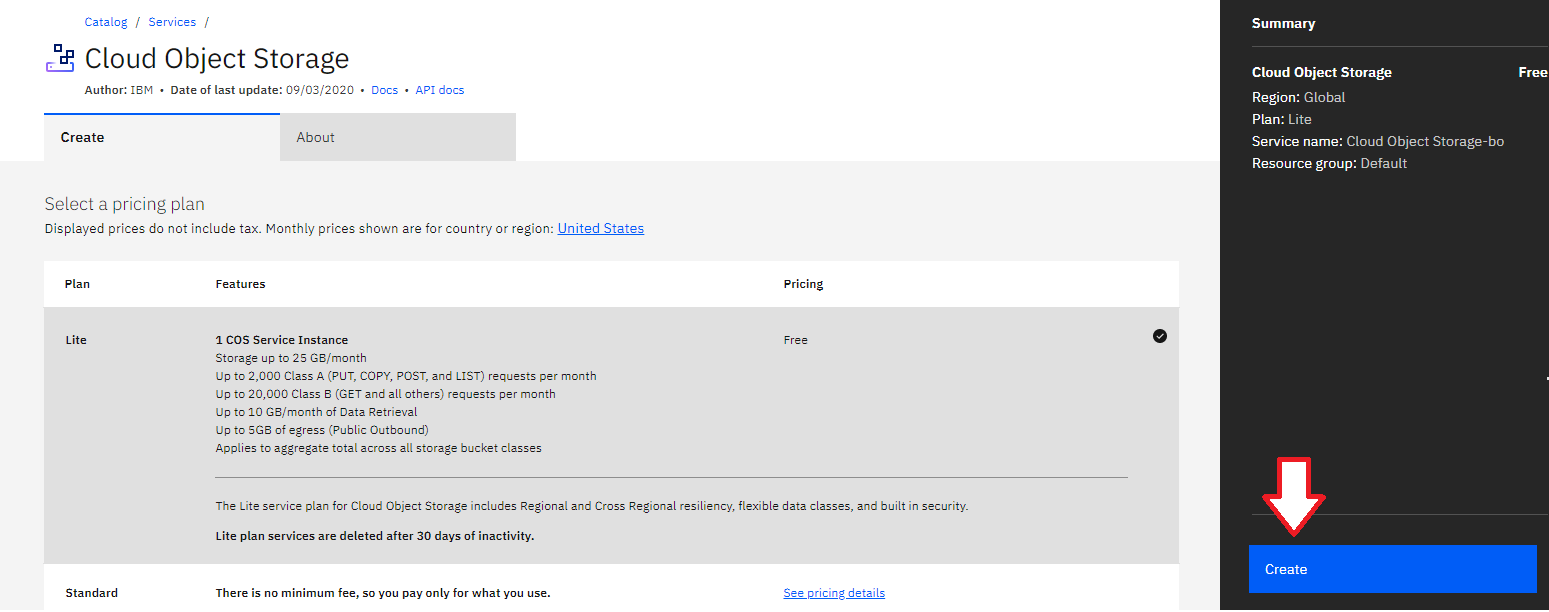
You will be shown a screen: leave the default settings and click “Create”:
Your IBM Cloud Object Storage has been created successfully.
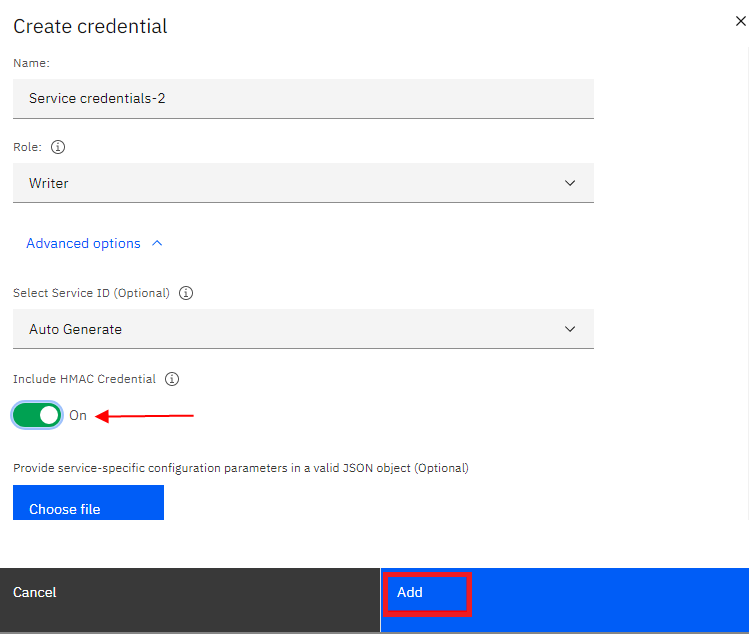
Once the storage is created, select “Service credentials” in the side menu to generate the Access Key and Secret Key (HMAC credentials) that you will use in Iperius Backup to upload data. Click on “New credentials,” and a window will open to configure the parameters. Enable the “Include HMAC credentials” option and leave the rest of the settings as default. Finally, click “Add” as shown in the image:
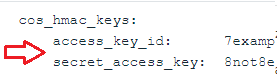
Once the credentials are created, you will find the Access Key and Secret Key generated. These are the credentials you need to enter in Iperius Backup:
In Iperius Backup, create a new backup operation and select the files and folders you want to back up (the “Items”):

In the next panel, “Destinations,” add a cloud destination using the appropriate button and configure the IBM Cloud account as shown in the following image:
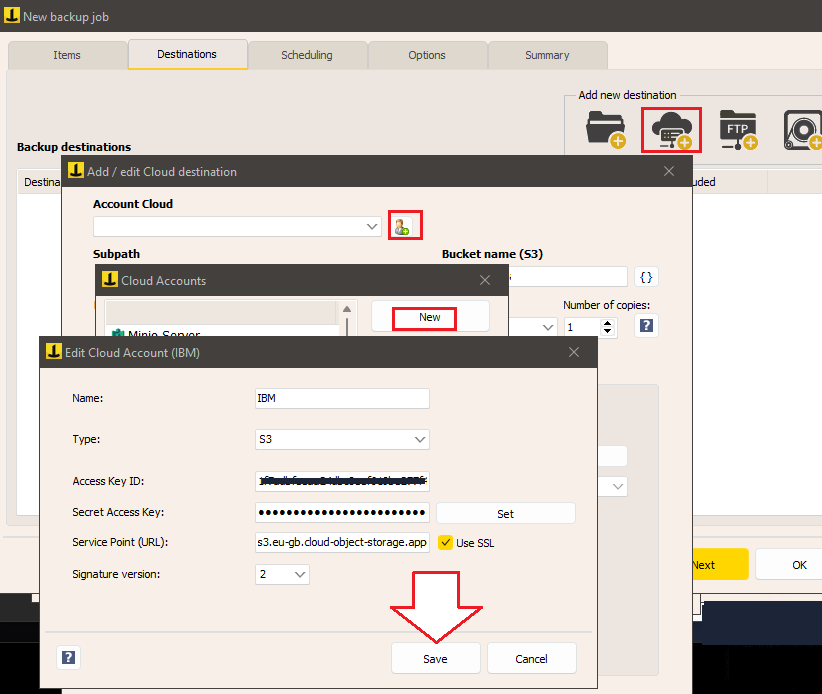
Give the account a name, select “Type” as “S3,” and enter the Access Key and Secret Key generated earlier. Select “2” as the signature type and enter the endpoint URL based on your region. You can find the list of endpoints at this link: https://cloud.ibm.com/docs/cloud-object-storage?topic=cloud-object-storage-endpoints&locale=it.
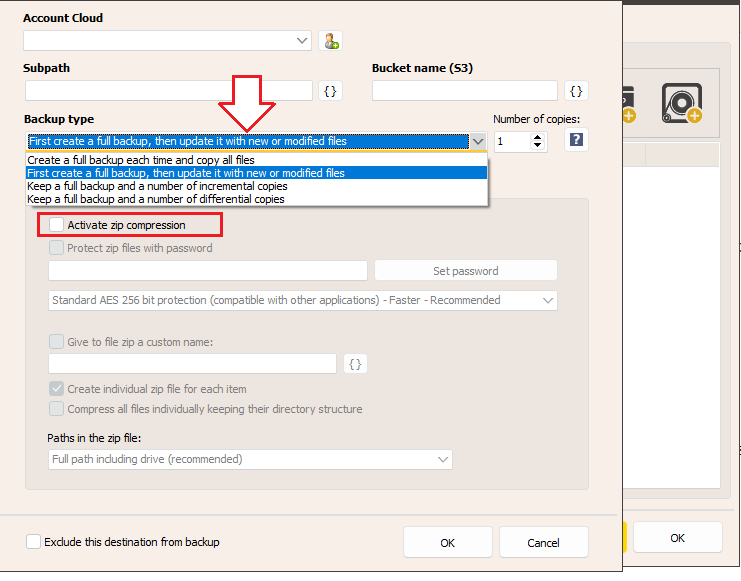
After successfully creating the account, you can proceed to the other destination options, such as defining the backup type (full, incremental, or differential), the number of copies to keep, compression, AES encryption with a password, and bandwidth limitation.
You can then configure the backup scheduling, email notifications, and other advanced options in the following panels:
Finally, assign a name to the backup operation and click “OK” to complete the configuration.
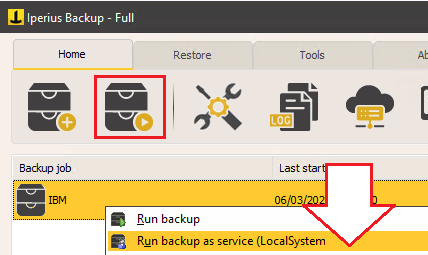
You can then immediately start the backup by right-clicking on the newly created operation:
The tutorial is now complete. We have seen how easy it is to configure an automatic backup on IBM Cloud to have a secure copy of data on a professional and always accessible remote storage. Remember that, in addition to the basic functionality of IBM Cloud, Iperius offers powerful backup options for disk images, VMware ESXi and Hyper-V virtual machines, Exchange and Office 365 mail servers, all of which can be run on IBM Cloud S3. The combination of Iperius Backup and IBM Cloud represents a complete and competitive solution to protect the IT infrastructure of any company.
Finally, it is worth mentioning that Iperius also offers its own S3 Storage service on advanced TIER IV datacenters, allowing you to perform the same operations you can do with IBM Cloud, but with a centralized interface for managing licenses and a web console for viewing and downloading files. The service is Iperius Storage S3, and you can read more information on this page.
For any questions or doubts regarding this tutorial,
Contact us