← All Tutorials
Backup on Azure Storage with Iperius
Iperius is a versatile and powerful backup solution. Among the many destinations for online backup, it also includes the Microsoft Azure cloud platform.
In addition to saving on Azure Storage, Iperius supports the main cloud storage services available, such as Amazon S3, Google Drive, OneDrive, and Dropbox (as well as any other S3-compatible storage, such as Wasabi, Backblaze, IBM Cloud Object Storage, Aruba Cloud, etc.).
In this guide, we will discover how easy it is to perform a remote backup on Azure Storage.
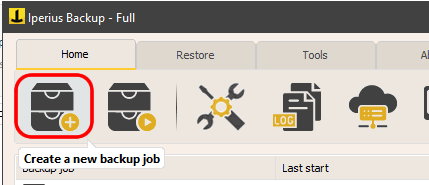
From the main window of the program, create a new backup operation:
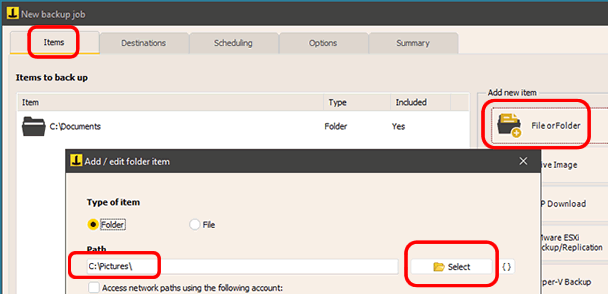
Select the files and folders you wish to save to Azure Storage:
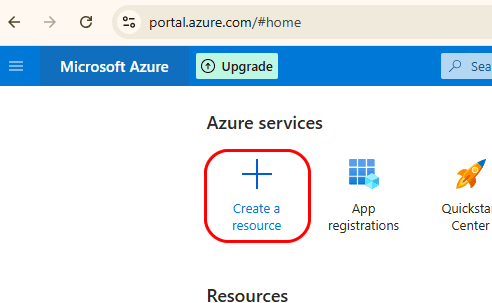
To enable Azure Storage, you need to sign up for Microsoft Azure and access the management console (https://portal.azure.com/#home). Here you can activate the “Storage” service, create “containers” for your files, upload and manage data through an intuitive interface. To allow Iperius to transfer files to Azure Storage’s cloud space, you need to obtain access codes, following the procedure shown in the images below.
Start by clicking the button to add a new resource:
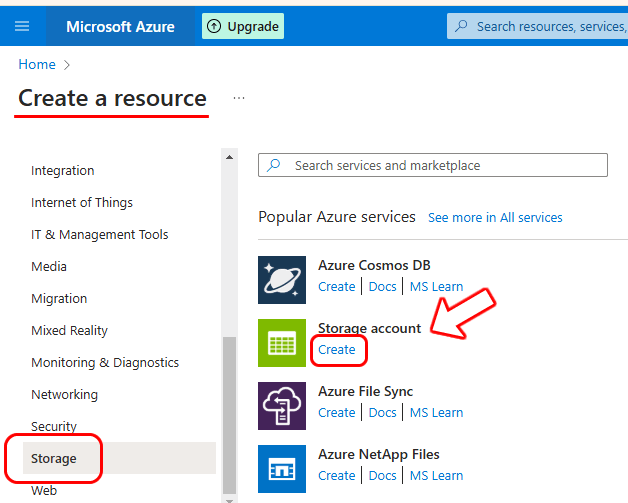
On the next page, select the “Storage” resource type from the left menu and then click the link to create a storage account, as shown in the image below:
Create a storage account by filling in all the required fields, as shown in the image below.
You need to give a name to the subscription and select a resource group (you can easily create a new one). Then, assign a unique name to the storage account (Storage account name): this name must be globally unique, like a domain name.
You can then select the region where the data will be physically stored when uploaded to Azure. Of course, it is preferable to choose the region as close as possible to the geographical location from which the data will be uploaded, in order to achieve the highest upload speed and the lowest latency.
The last two options affect both performance and reliability, as well as the cost of storage. You can choose to enable Premium mode for lower latency, or opt for geographically redundant storage, meaning the data will be automatically duplicated across multiple Azure regions for maximum availability. Generally, you can leave it in standard mode with local redundancy to keep costs lower, as the reliability is already very high.

You can leave the default options in the other panels and proceed by clicking “Review + Create” to create the storage.
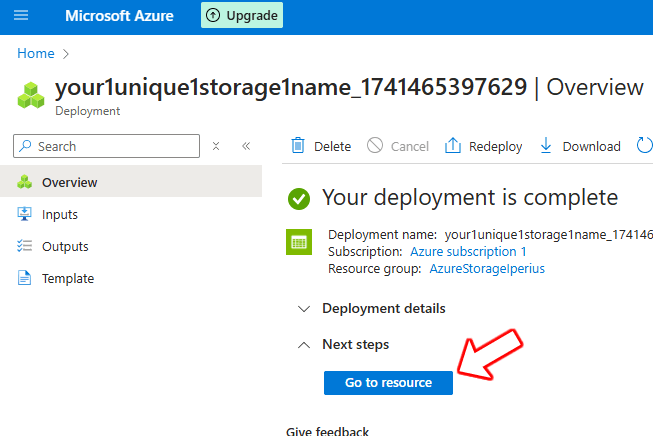
Once the storage creation is complete, you can retrieve the access keys for integration with Iperius.
Click the button to go to the resource you just created, as shown in the image below:
In the resource properties, click on “Access keys” under the “Security + networking” section in the left menu.
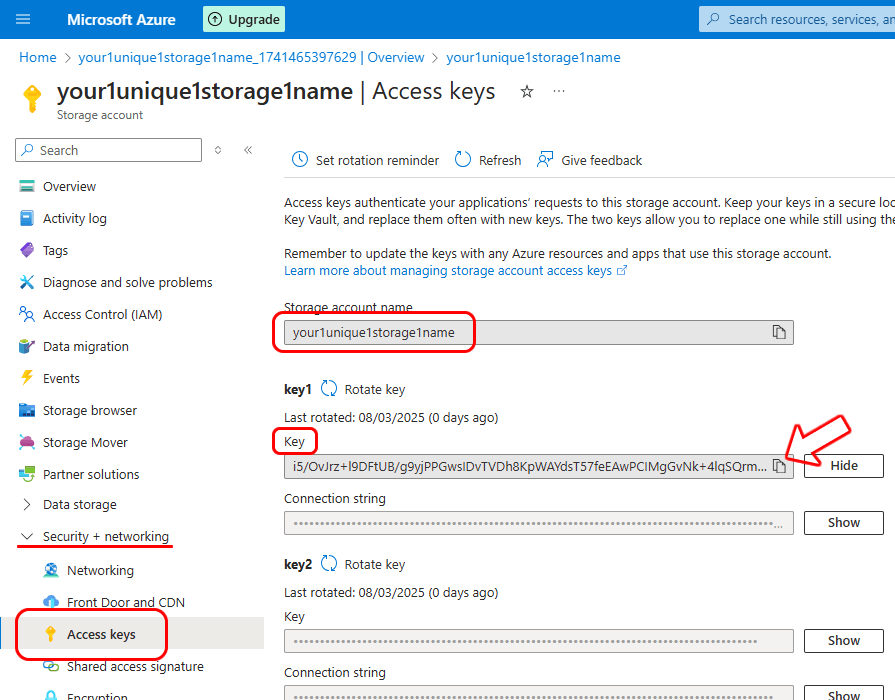
Here, you can find the storage account name (the username to enter in Iperius) and the key (the password to enter in Iperius). Click the appropriate button to show the key and copy it.
Now that you have the credentials for your Azure storage space, you can add a cloud destination in Iperius Backup by creating a new account for Microsoft Azure, as shown in the image below:

Once the connection account for Azure storage is created, there are a few other important configurations you need to make for the cloud destination.
Container Name: The container is the primary container for files and folders (similar to Amazon S3’s bucket), and its name can only consist of lowercase letters, numbers, and the symbol “-” (hyphen). For more information on naming conventions for containers, visit this Microsoft page: https://learn.microsoft.com/en-us/rest/api/storageservices/naming-and-referencing-containers–blobs–and-metadata.
Subfolder: You can specify a subpath where to save the files.
Backup Type: You can specify whether to create a full backup or an incremental or differential backup and specify the number of copies to keep.
In the panels below, you have the option to specify many options, including zip compression (with AES 256-bit password protection) and synchronization.
Finally, save the cloud destination configuration by clicking “OK.”
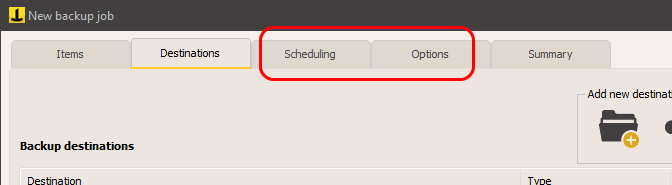
Next, we can set up the automatic backup schedule and email notifications to stay informed about the status of the operations.
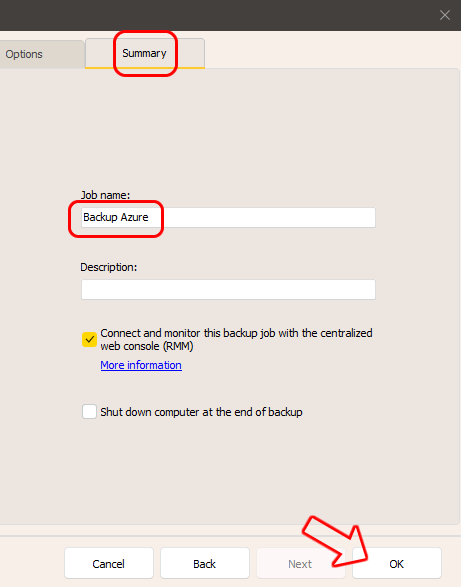
Finally, enter the name for the backup operation and confirm by clicking the “OK” button.
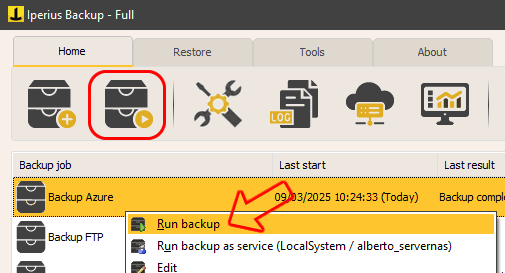
Once the new operation is created, you can start it by right-clicking and selecting “Run backup.”
Thanks to backup on Azure, we can ensure the security and integrity of our data by storing it in a remote location safe from failures or ransomware viruses, even with the protection offered by AES 256-bit encryption and the HTTPS protocol.
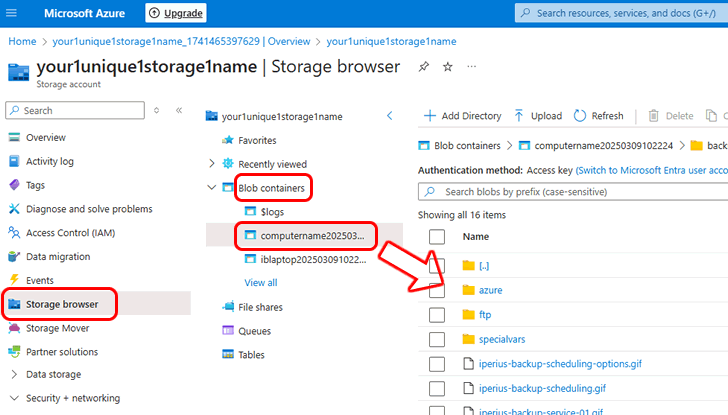
Once the backup is complete, you can immediately view the files on Azure Storage using the dedicated browser available on the Azure portal:
For any questions or doubts regarding this tutorial,
Contact us