← All Tutorials
Restore VMware ESXi virtual machines with Iperius
Iperius Backup is an advanced software for the protection and replication of VMware ESXi virtual machines. Among its features, it offers several options for automatic recovery, even from incremental and differential backups, for ESXi or vCenter virtual machines. This allows you to perform a highly granular restore, such as choosing to restore a VM to a specific date corresponding to an incremental backup.
You can restore a virtual machine even on a different host or datastore than the original one. Additionally, Iperius allows you to recover individual files directly from incremental backups, differential backups, or any VMDK file (file-level restore).
For a detailed guide on virtual machine backups, check the dedicated tutorial.
If you would like to learn how to restore individual files (file-level restore), refer to this guide.
In this tutorial, we will see how easy it is to restore a VM backup using the wizard provided by Iperius:
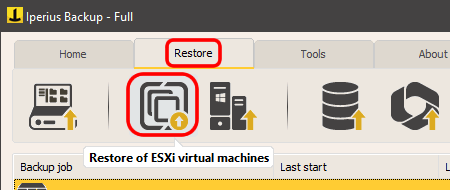
To access the restore window, use the dedicated button:
To begin, you need to create a connection account to an ESXi host or a vCenter server (if the backup was made on the same machine, the account will already be in the list). After entering the IP address, username, and password, you can proceed with the connection.
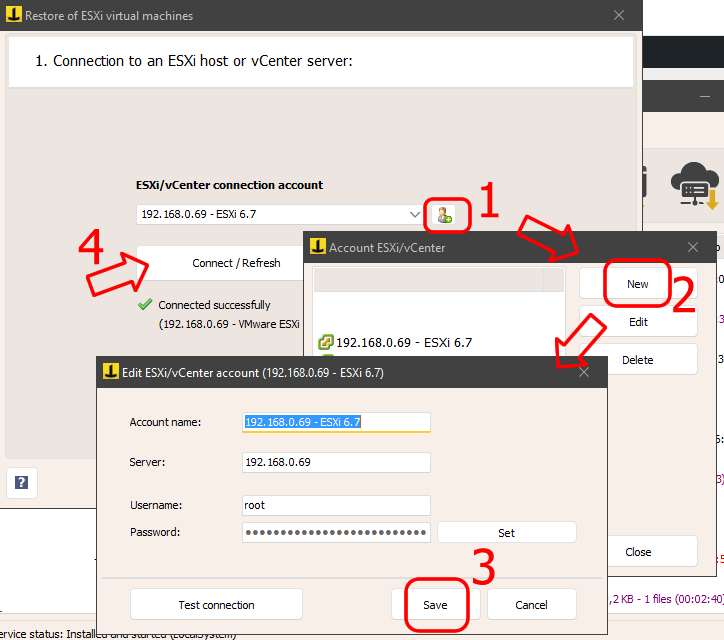
Once connected, click “Next” to continue.
At this stage, we need to select the folder containing the virtual machine backup (usually, the folder name corresponds to the name of the VM that was backed up).
If the backup is saved on a network path (like a NAS), we can specify an account for access, if necessary.
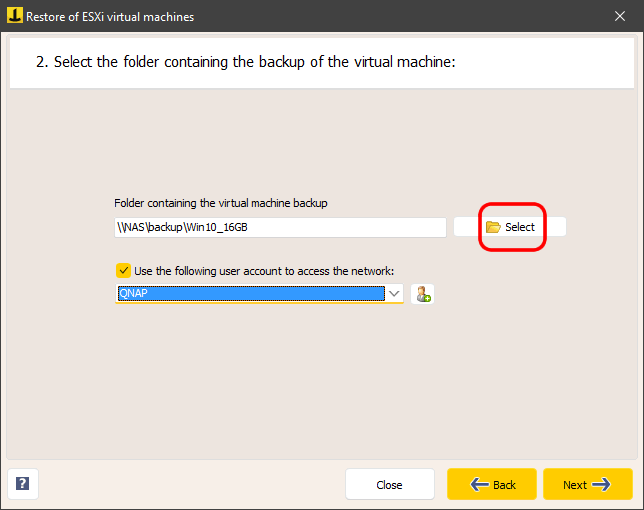
After selecting the path, click “Next”. Iperius will check for a valid backup; if an error occurs, a warning message will be shown. If the backup is valid, the following window will appear:
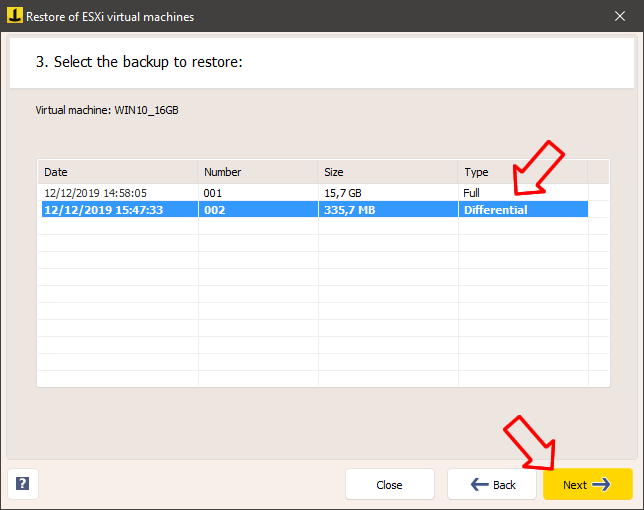
Iperius will display all available backups for the selected VM, with their respective dates and sizes. There may be only Full backups or a combination of Full, incremental, and differential backups.
Select the backup corresponding to the desired date and click “Next”.
In the next panel, as shown below, we need to choose the destination datastore for the restore. If connected to a vCenter, we will see all the datastores of the connected hosts; otherwise, only the ones for the host we are connected to will be available. Here, we can also check the available space in the datastore to ensure there is enough space for the VM restore:
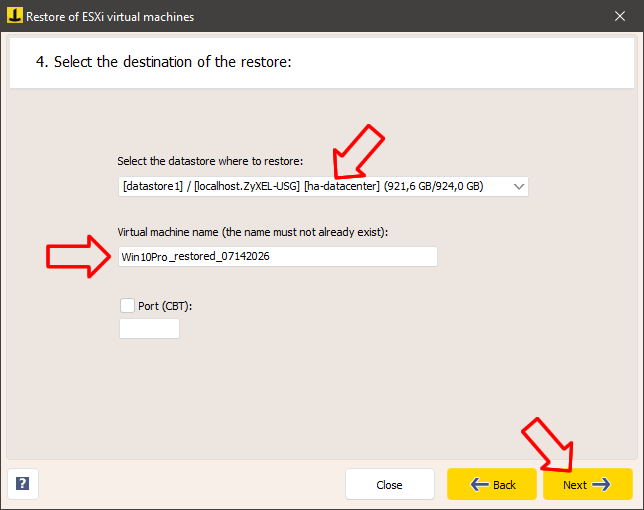
After choosing the datastore and assigning a name to the virtual machine to be created (the name must be unique), click “Next”.
On the final screen, you can review a summary of the selected settings and start the restore by clicking the corresponding button:
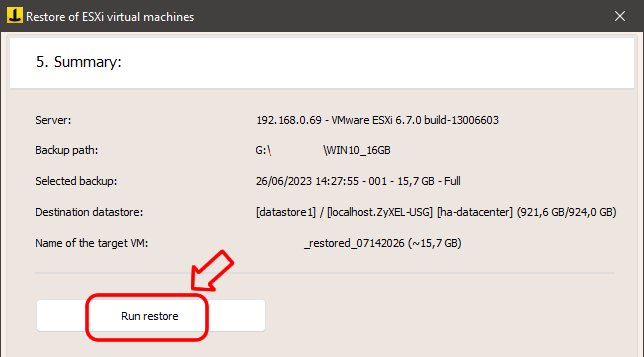
During the restore, detailed information and progress percentage will be shown. You can stop the operation using the dedicated button. Once the process is completed, the virtual machine will be immediately bootable from the VMware vSphere interface.
In this tutorial, we have seen how to intuitively restore a VMware ESXi virtual machine, even on a different host or datastore. Remember that Iperius also allows for file-level restore from incremental, differential backups, and VMDK files. To learn how to recover individual files, check the dedicated tutorial.
For any questions or doubts regarding this tutorial,
Contact us