← All Tutorials
Free VMware vSphere and ESXi Replication Software – Iperius
There are many software solutions for backing up and replicating VMware vSphere / ESXi virtual machines, but few combine completeness and flexibility like Iperius Backup, while ensuring lightweight performance with minimal impact on system resources.
With just a few MB of installation and negligible memory and CPU usage, Iperius allows you to perform backups and replication of virtual machines across an unlimited number of hosts, offering full compatibility with:
- vSphere
- ESXi Free
- vCenter
- ESXi Cluster
One of the main advantages of Iperius is its extremely simple license, which allows access to advanced features at an unbeatable cost. Below are the main benefits.
With just one installation of Iperius Backup, you can:
- Perform backup and replication of ESXi hosts and vCenter without limits (as long as they are reachable over the network)
- Save an unlimited number of virtual machines
- Have no restrictions on the number of VMs, servers, or hardware specifications
- Backup to multiple destinations: Other ESXi hosts, datastores, NAS, FTPS, SFTP, Cloud, Amazon S3, Google Drive, Microsoft Azure Storage, Dropbox, OneDrive, Backblaze, Wasabi, Aruba Cloud, IBM Cloud Storage, and any other S3-compatible storage.
The main features that make Iperius Backup one of the best solutions for ESXi backup and replication include:
- Lightweight installation, low costs, and no restrictions on the number of servers or VMs
- Incremental backup with only used space saved (thin provisioning) and incremental replication
- Support for incremental backup even on ESXi Free
- Incremental replication and forever-incremental even on ESXi Free
- Backup to unlimited destinations
Now, let’s see how to set up an incremental replication of virtual machines, one of the most powerful and comprehensive features of Iperius.
After installing Iperius on a Windows system, you can immediately configure a backup and connect to a vCenter or directly to an ESXi host:
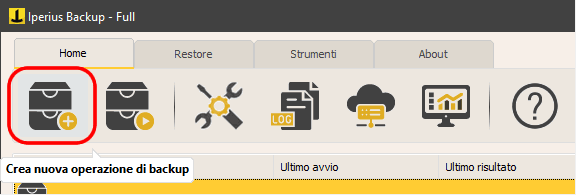
Create a new backup operation by clicking the first button in the main window:
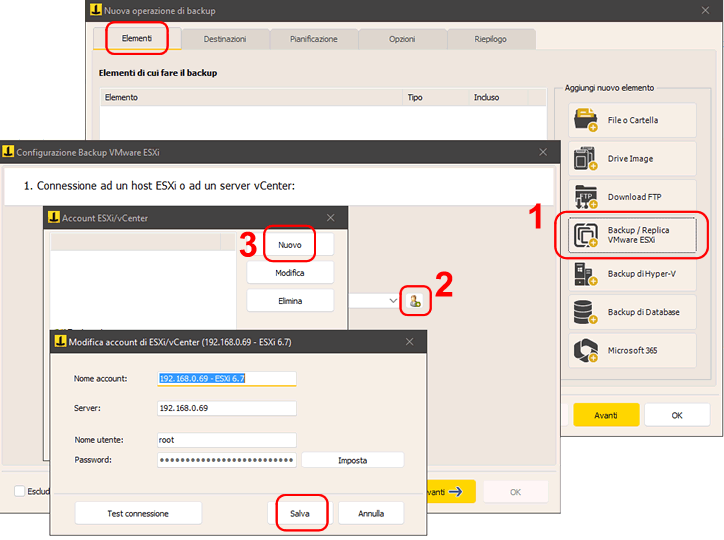
Next, create a new connection account for ESXi by specifying the address, username, and password:
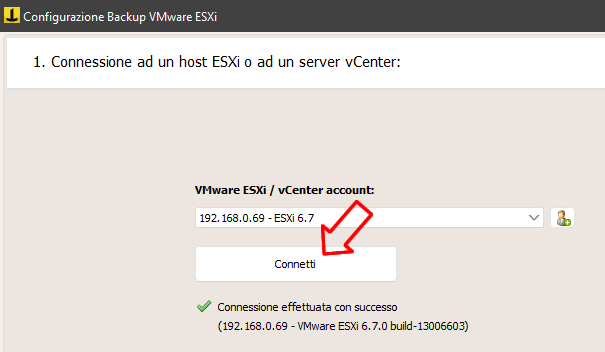
Click the “Connect” button and then click “Next.”
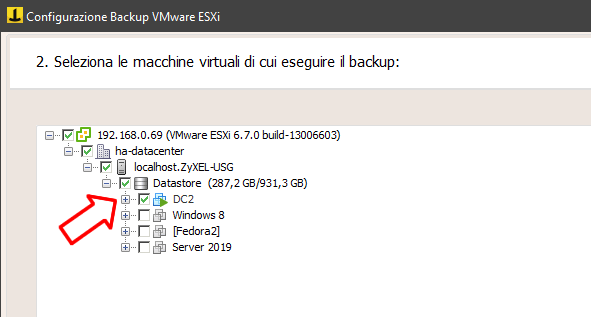
Proceed by selecting the virtual machines to replicate:
In the next panel, you can configure the replication settings:
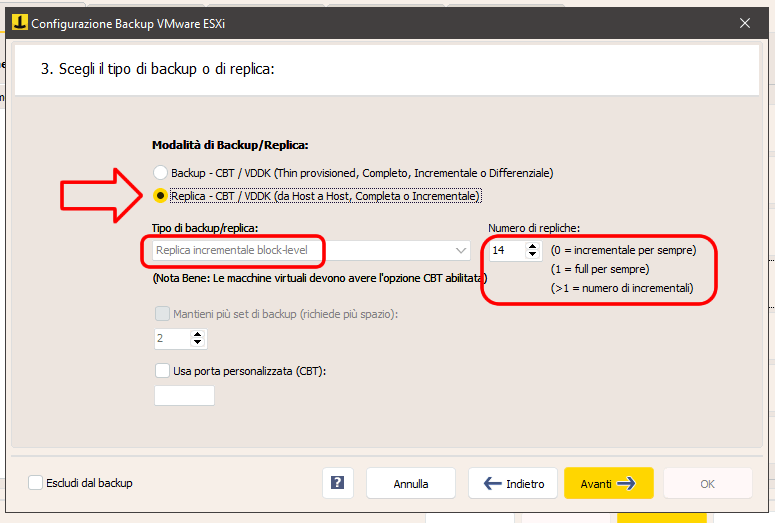
It is recommended to use the default option, which performs regular incremental replication and a full replication every 14 cycles (in this case, if replication is done daily, the full replication will occur every two weeks).
You can then choose between a fully complete replication (slower) or a forever-incremental replication, which updates the replicated VM with only the modified blocks.
Next, select the datastore and target host:
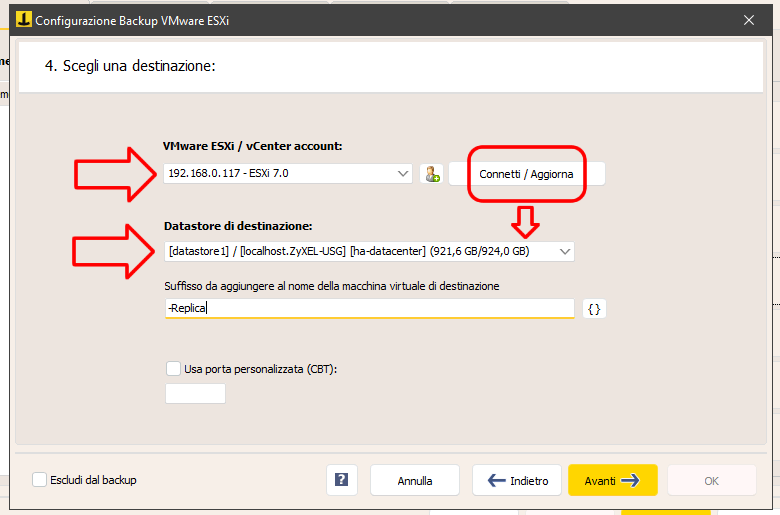
If the target ESXi host is different (replication can even be done on the same ESXi host, possibly in a different datastore), you need to create a new account, click “Connect / Update,” and check the available space in the selected datastore.
After defining a suffix for the replicated VM’s name (which can help distinguish it from the original), save the replication configuration by clicking “OK” on the last panel (for each virtual machine you choose to replicate, advanced options can also be selected):
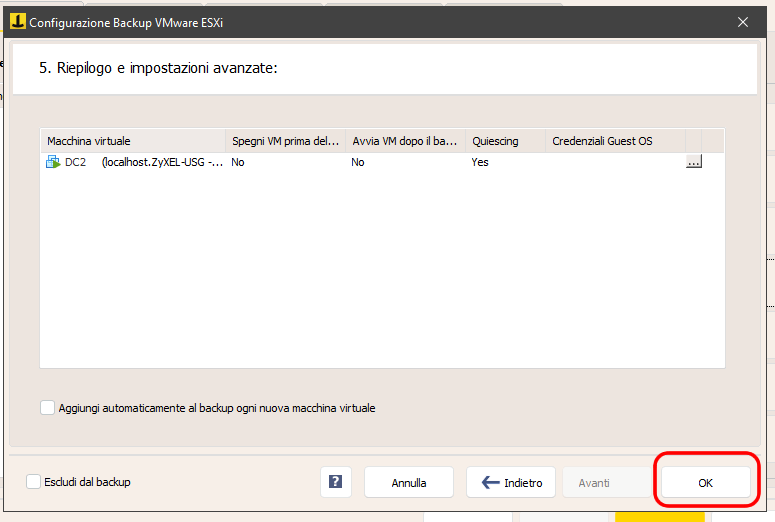
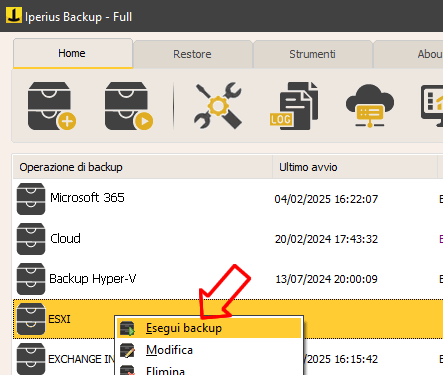
At this point, the replication operation is ready to be executed.
You can schedule the operation, enable email notifications, or start it manually:
As shown in this guide, Iperius Backup is an intuitive and efficient solution for replicating VMware vSphere and ESXi Free virtual machines.
Download Iperius Backup
For any questions or doubts regarding this tutorial,
Contact us